
How to Shrink a Volume on a Hard Drive (Windows)
by January 17, 2017 2:34 pm 0
In this guide I will show you how to decrease the size of a volume on a hard drive in order to free up space for a new partition:
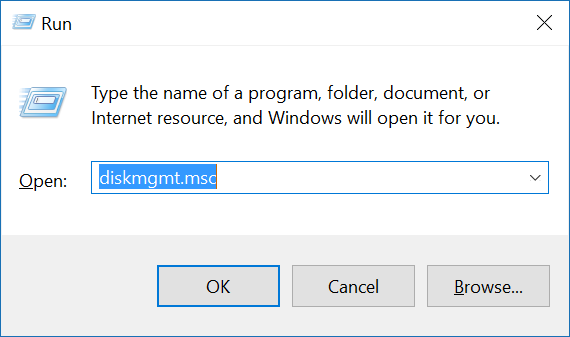
1. Press Windows Key + R on your keyboard to open the run dialog box
2. Type in “diskmgmt.msc” and press OK to open Disk Management (You can also open Disk Management by browsing to Control Panel (small icons view) -> Administrative Tools -> Computer Management -> Disk Management (in the left pane))
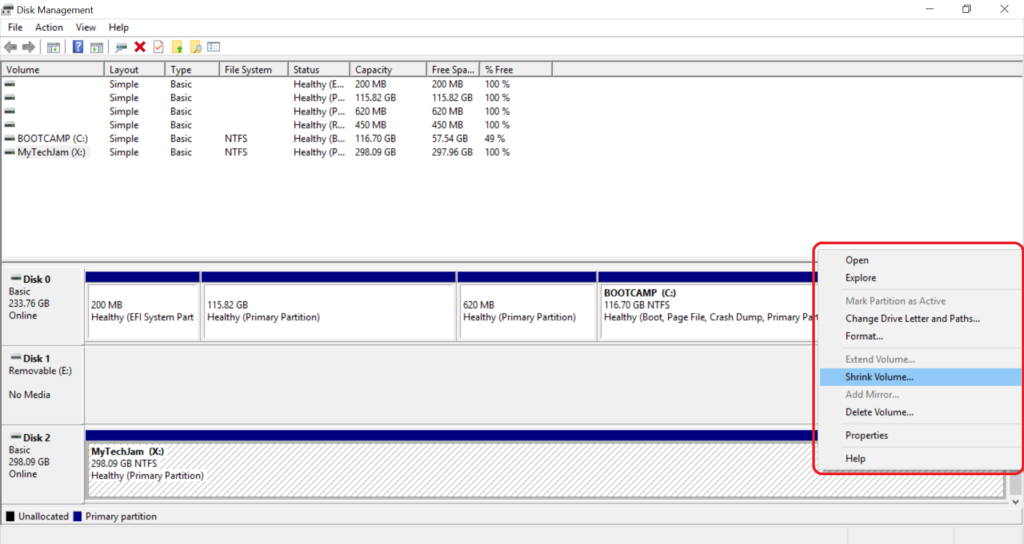
3. Select the volume you would like to shrink, right click it, and choose Shrink Volume
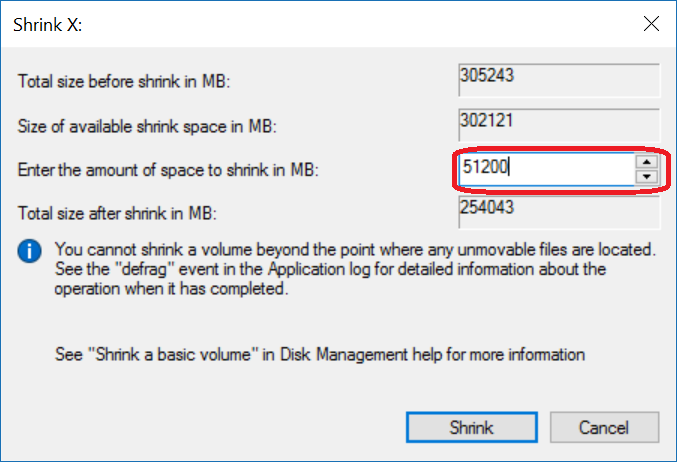
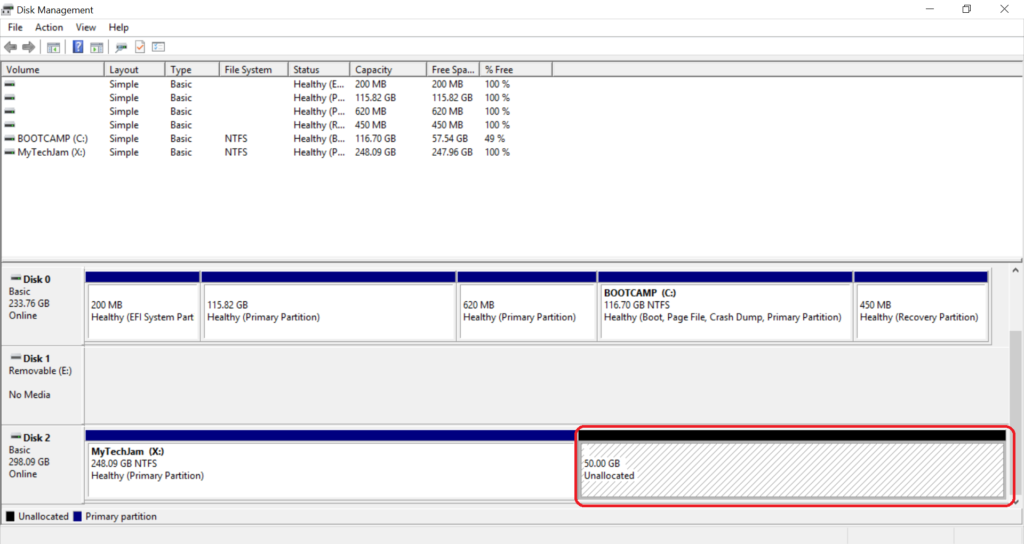
4. Enter the amount of space you would like to remove from the volume and click shrink (I have entered 50 GB)
5. The size of the volume should now have been successfully decreased and you should have unallocated space on your drive
6. You are now free to create more partitions on your hard drive
Note: You can follow my guide here on how to create a new volume in the unallocated space on your hard drive.
Related posts

Amazon / by - September 24, 2017 10:59 pm
How To Jailbreak The Amazon Fire TV Stick | September 2017
Check out my updated video guide (September 2017) on how to jailbreak your Amazon Fire TV or Fire TV Stick and install Kodi 17.4 Krypton with the Covenant add on!…

Amazon / by - April 21, 2017 11:32 pm
How To Reset Kodi To Factory Defaults on Amazon Fire Stick
Check out my video guide on how to reset Kodi to factory defaults or factory reset Kodi on your Amazon Fire TV or Amazon Fire TV Stick.

Amazon / by - April 14, 2017 5:49 pm
How To Play MAME on Amazon Fire TV (Arcade Games)
Check out my video guide on how to play MAME arcade games on the Amazon Fire TV or Amazon Fire TV Stick. In this guide we will be using the…

Amazon / by - April 5, 2017 12:11 am
How To Jailbreak The Amazon Fire TV Stick | April 2017
Check out my updated video guide (April 2017) on how to jailbreak your Amazon Fire TV or Fire TV Stick and install Kodi 17 Krypton with the Exodus add on!…